1. Introduction
Once you have created a Knowledge Base, the next step is to add sources — the documents and web content that form your knowledge store. This guide covers how to upload files, add URLs, and manage linked sources within a Knowledge Base.
Who is this guide for? Users who need to populate a Knowledge Base with documents, manage existing sources, or understand source processing states.
2. Prerequisites
Before you begin:
- A Knowledge Base must already be created (see Create a Knowledge Base).
- Have your source documents ready in a supported format.
Supported File Formats:
| Format | Extension | Description |
|---|---|---|
.pdf | PDF documents | |
| Markdown | .md, .mdx | Markdown and MDX files |
| Plain Text | .text | Plain text files |
| JSON | .json, .jsonl | JSON and JSON Lines |
| CSV | .csv | Comma-separated values |
3. Adding Sources to a Knowledge Base
3.1 Navigate to Source Management
- Open the Knowledge Base from the listing page by clicking its name.
- Click the Source tab in the left panel.
3.2 Link a New Source
Click the + Link Source button in the Source tab.
- Alternatively, click the lightning bolt icon in the vertical sidebar on the left.
The Add Knowledge Entity form will appear with the following fields:
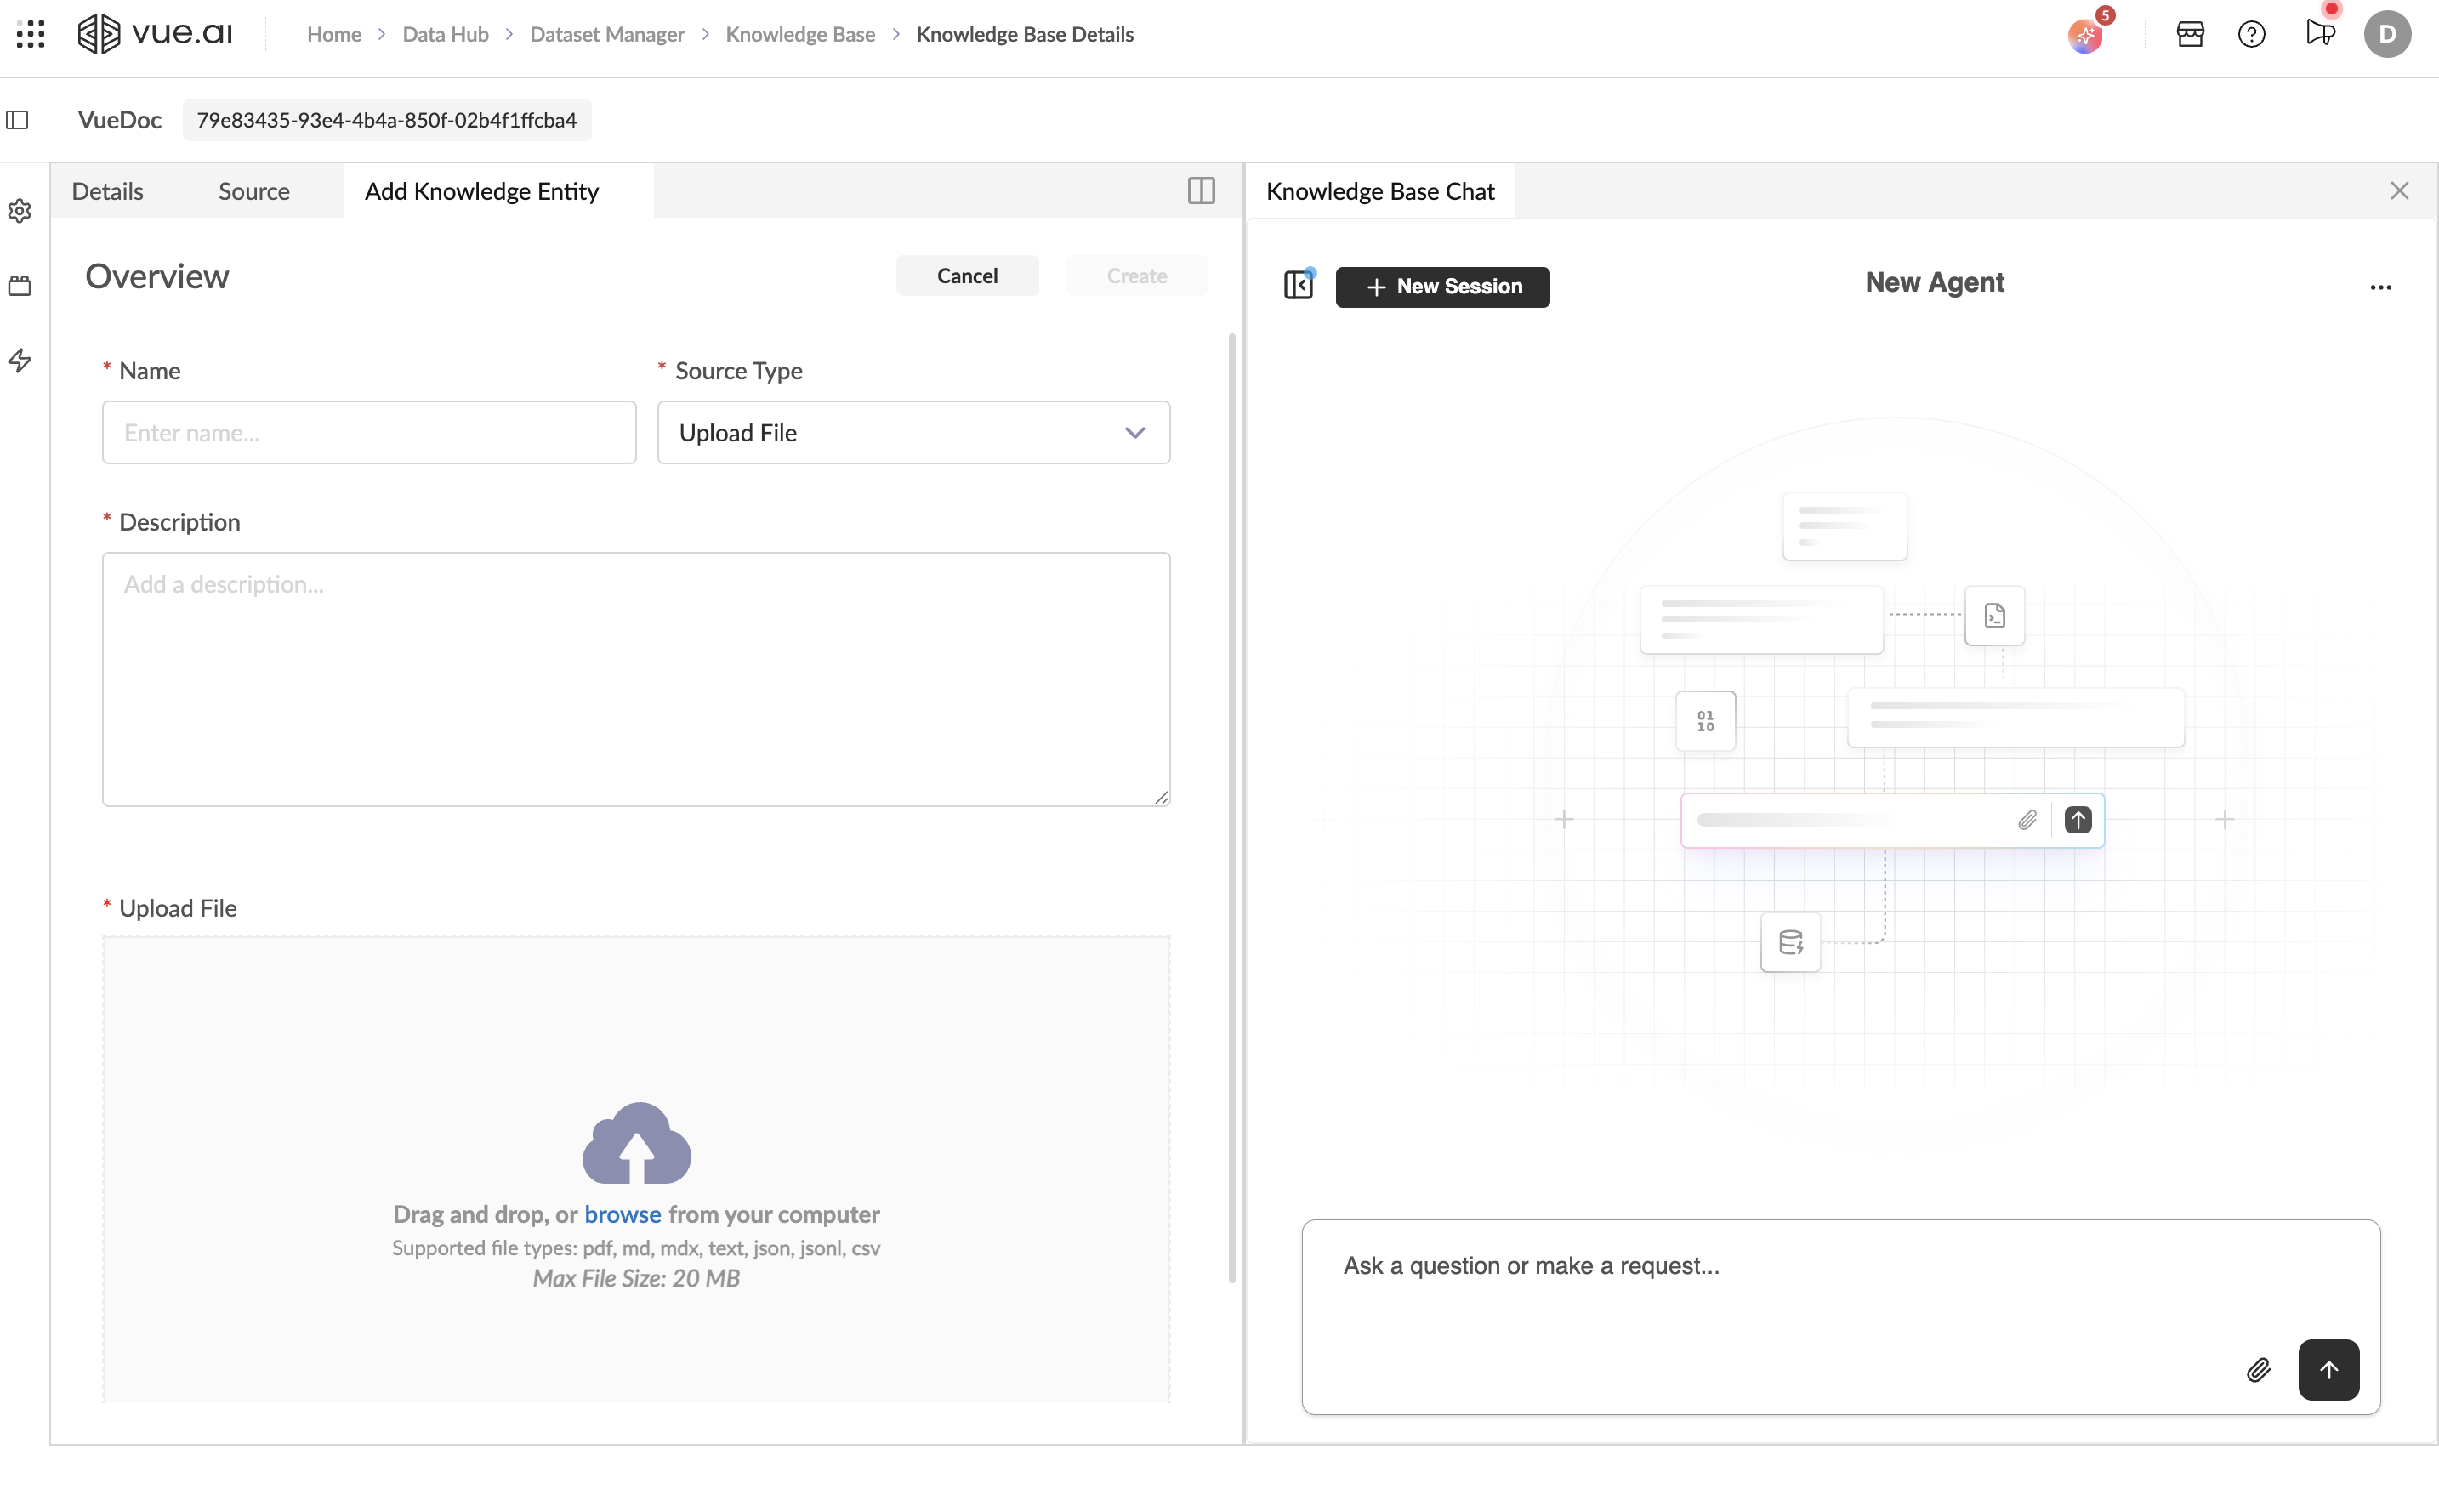
Entity Name (Required)
Provide a descriptive name for this source (e.g., "Q4 Sales Report", "Employee Handbook").
Source Type (Required)
Select the ingestion method from the dropdown:
Option 1 — Upload File:
- A drag-and-drop zone appears.
- Drag your file into the zone, or click to browse and select a file.
- Supported formats:
.pdf,.md,.mdx,.text,.json,.jsonl,.csv.
Option 2 — URL:
- A text input field appears.
- Enter the full publicly accessible URL of the document you want to ingest (e.g.,
https://example.com/documentation).
Description (Required)
Add a brief description of the source content. This helps identify what information this source contains.
- Click Create to add the source.
When uploading multiple related documents, use consistent naming conventions (e.g., "Resume - John Doe", "Resume - Jane Smith") to make them easier to find and manage.
4. Viewing Linked Sources
After adding sources, the Source tab displays all linked sources as cards. Each card shows:
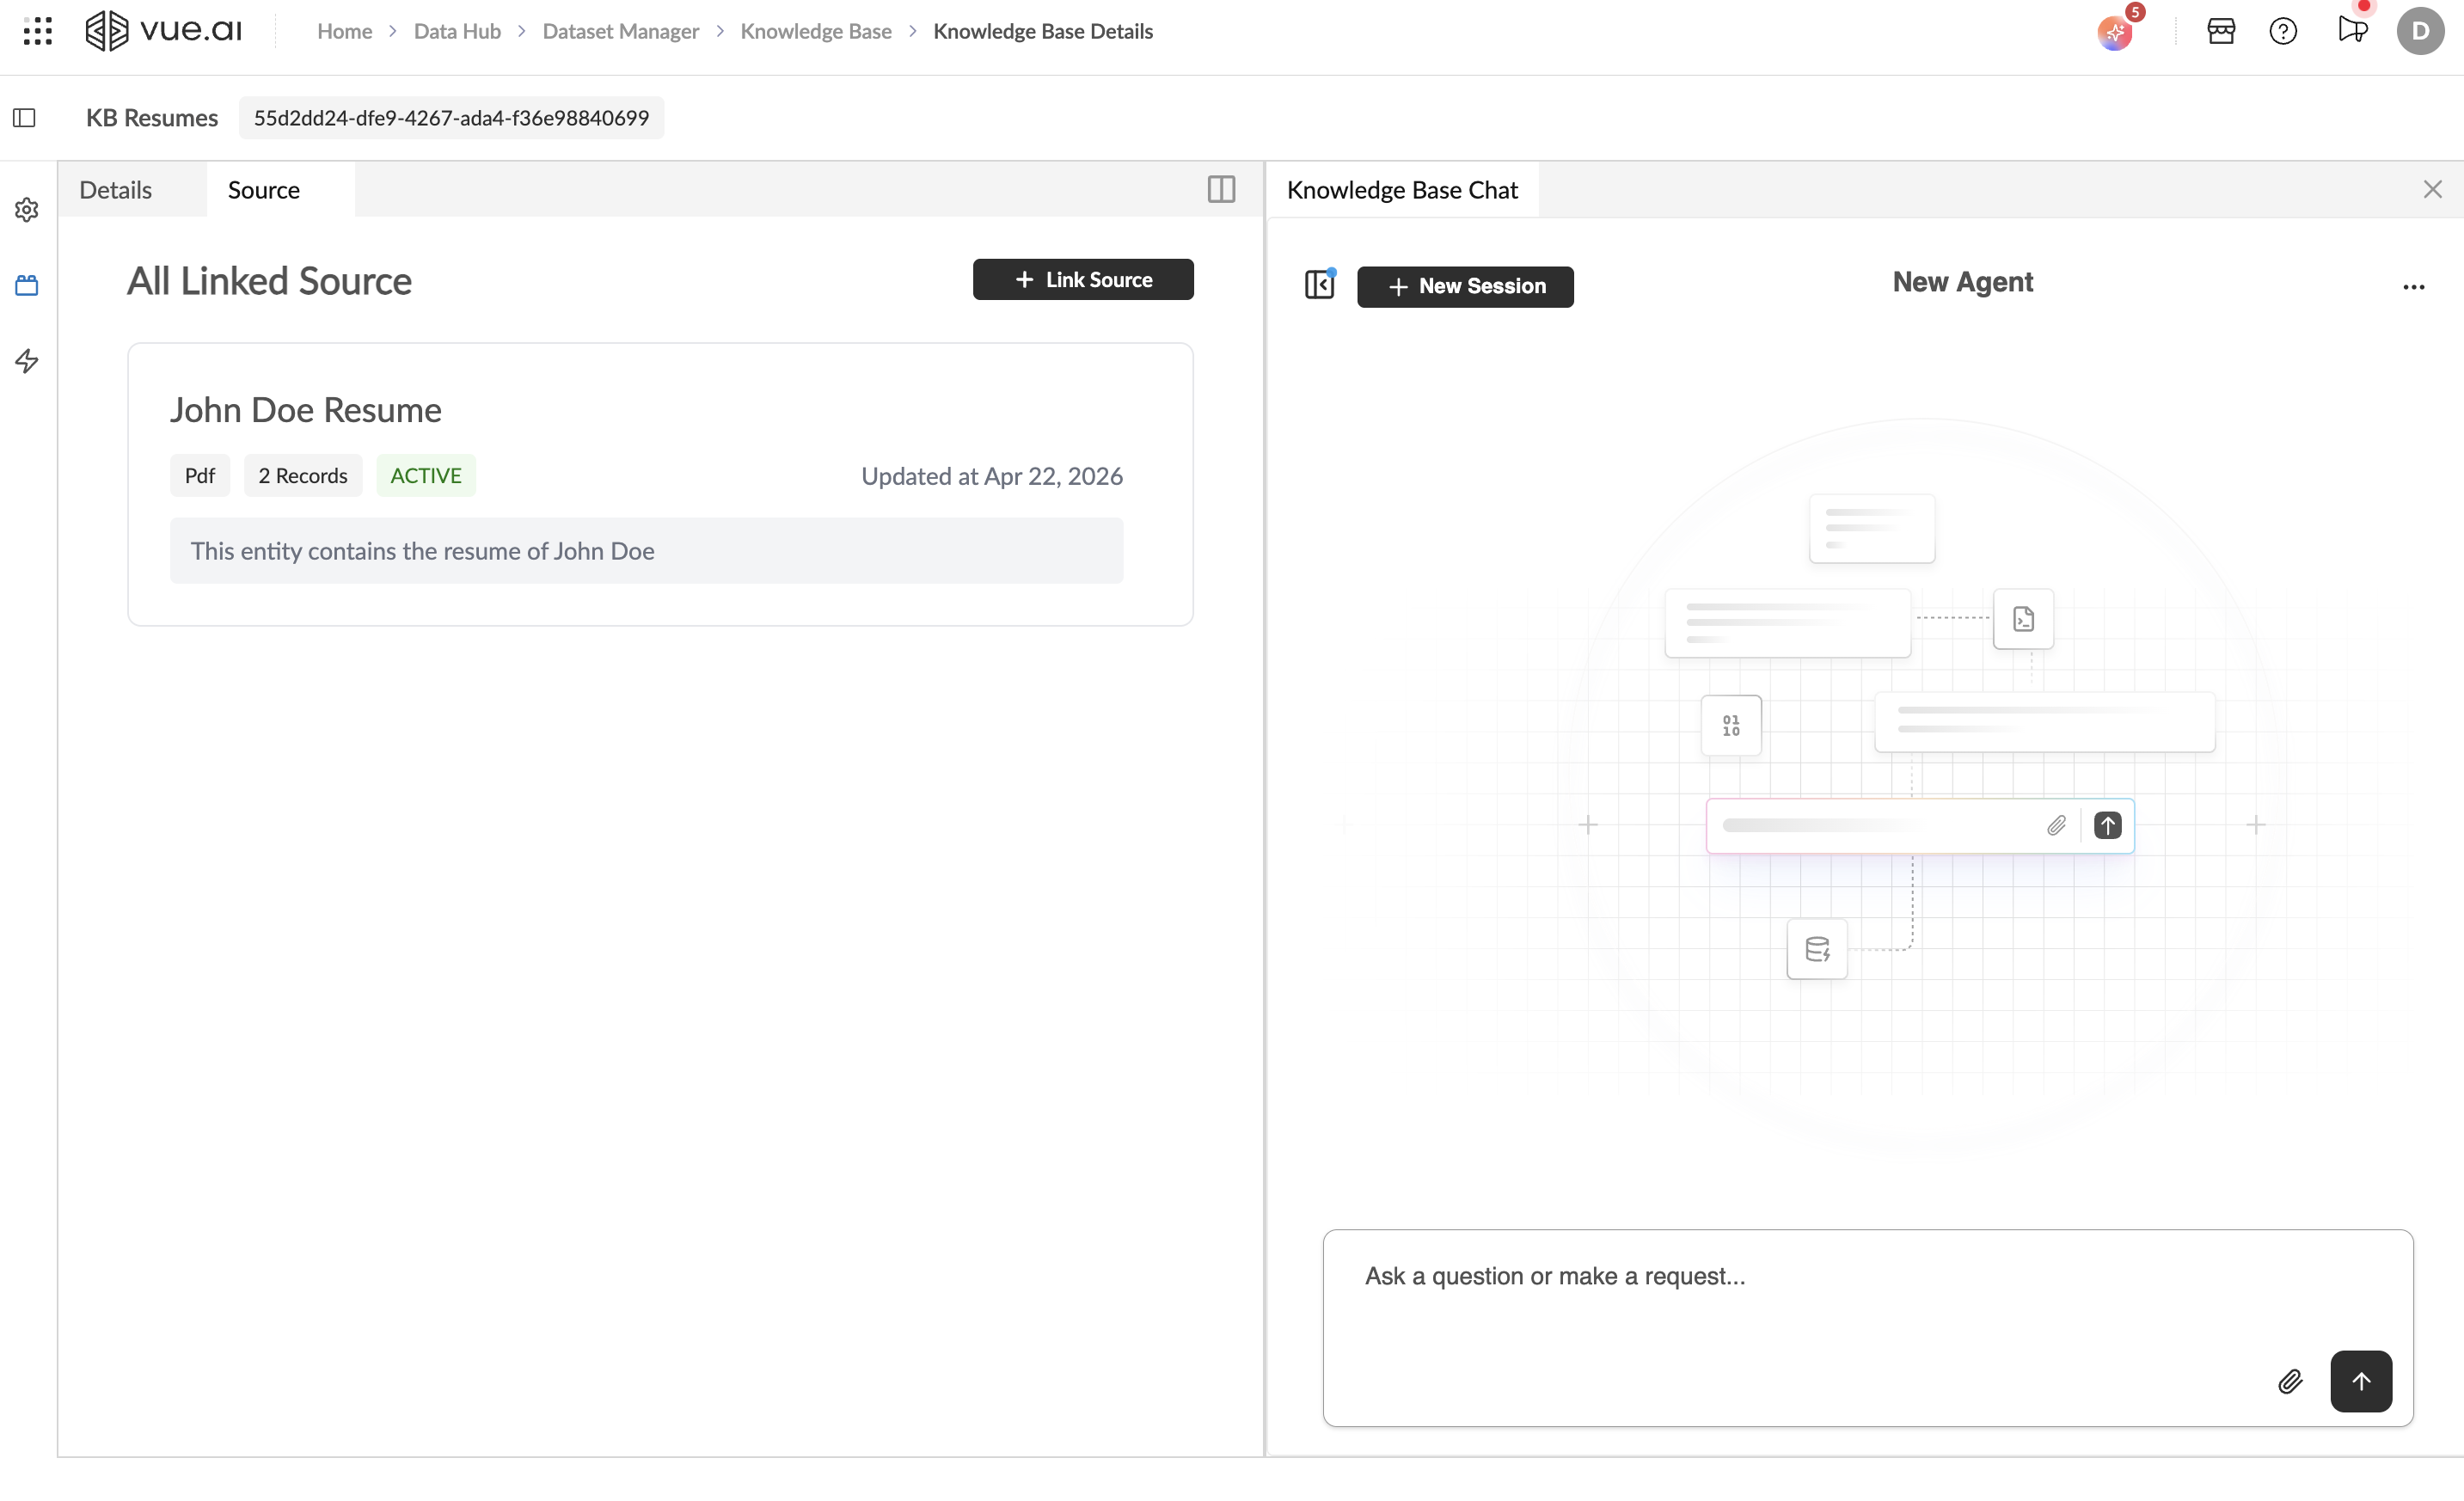
- Source Name: The name you assigned when creating the entity.
- Type Badge: The file format (e.g.,
Pdf,Md,Csv). - Record Count: Number of records (chunks) extracted from the source (e.g.,
2 Records). - Status Badge: Processing status, displayed as a colored badge:
- ACTIVE: Source is successfully processed and queryable.
- ERROR: An error occurred during ingestion. The job ID will be shown, which can be used for debugging.
- Updated Date: Timestamp of the last update (e.g.,
Updated at Apr 16, 2026). - Description: The description text provided when the source was created.
5. Understanding Source Processing
When a source is added to a Knowledge Base, the platform automatically:
- Parses the content based on the file format.
- Chunks the content into discrete records for indexing.
- Indexes the records to enable efficient retrieval during queries.
The processing is fully automated — no manual configuration of chunking strategies or embedding models is required at the source level. Once the status shows ACTIVE, the source content is ready for querying through the Knowledge Base Chat.
Note: The number of Records shown on the source card indicates how many chunks were extracted. A short document might produce 1–2 records, while a longer document could produce many more.
6. Managing Existing Sources
Adding More Sources
You can add additional sources to an existing Knowledge Base at any time by clicking + Link Source in the Source tab. There is no limit on the number of sources in a Knowledge Base.
Viewing Source Details
Click on a source card to view additional details about the linked entity, including its content preview and metadata.
7. Tips and Best Practices
- Descriptive Names: Use clear, descriptive names for each source so you can quickly identify them later.
- Consistent Tagging: Apply consistent tags at the KB level to organize related Knowledge Bases.
- Document Scope: Consider creating separate Knowledge Bases for different domains (e.g., "HR Documents" vs. "Technical Documentation") rather than putting everything in one large KB.
- Supported Formats: Convert unsupported file formats (e.g., Word, Excel) to a supported format (e.g., PDF, CSV) before uploading.
8. Troubleshooting
Common Issues and Solutions
Problem: File Upload Fails
Cause: The file is not in a supported format. Solution: Ensure the file has one of the supported extensions: .pdf, .md, .mdx, .text, .json, .jsonl, .csv.
Problem: Source Remains in Pending State
Cause: The file may be too large or contain unparseable content. Solution:
- Verify the file is not corrupted.
- Try uploading a smaller file to test.
- Check that the file content is readable and properly formatted.
Problem: Record Count Is Zero
Cause: The document may be empty or contain only non-textual content (e.g., images in a PDF without OCR). Solution: Ensure the document contains extractable text content.
9. Next Steps
After adding sources, proceed to:
- Query a Knowledge Base — Use the KB Chat to query your documents.