This guide walks you through creating a fully functional Agent from scratch. By the end, you will have a deployed Agent that responds to user messages using a configured LLM and system prompt.
Prerequisites
- Access to the Vue.ai platform with permissions for the Automation Hub.
- A basic understanding of what an Agent is. See Core Concepts: Agents for the architecture overview.
Step 1: Navigate to the Agent Builder
- From the Vue.ai Home Page, open the left sidebar.
- Navigate to Automation Hub → Workflow Manager → Agents.
- You will land on the Agents Listing Page.
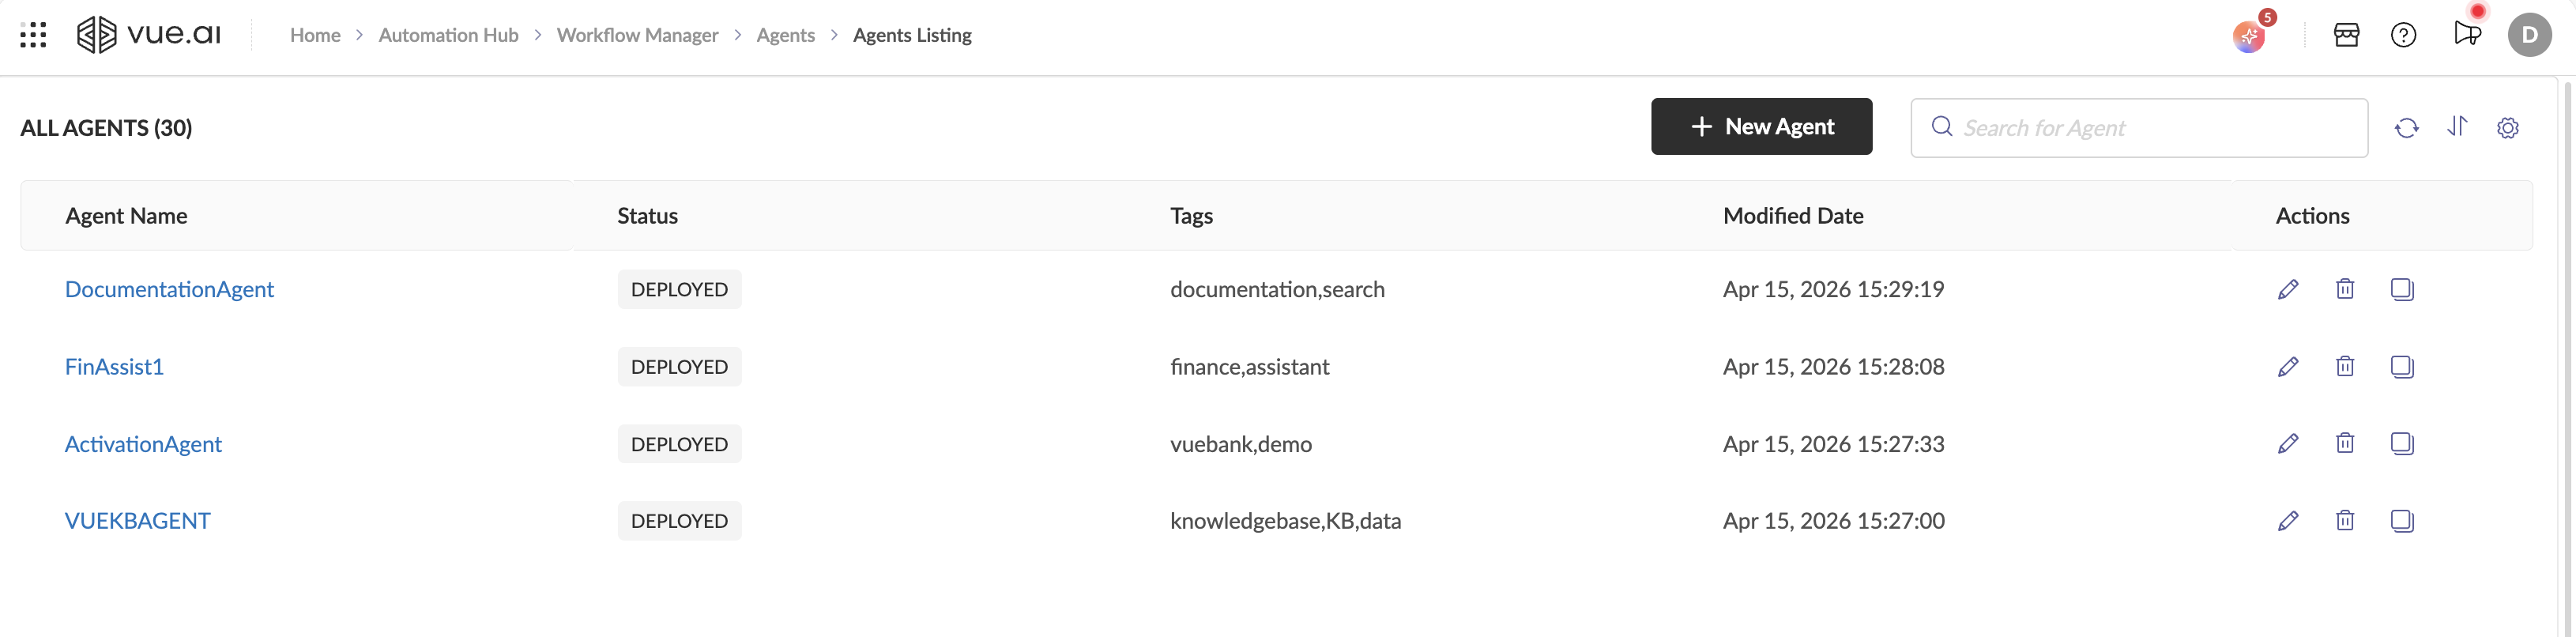
The listing page displays all existing Agents in a table with the following columns:
| Column | Description |
|---|---|
| Agent Name | Clickable link to open the Agent Builder for that agent. |
| Status | Deployment status — typically DEPLOYED. |
| Tags | User-defined labels for organizing agents. |
| Modified Date | Timestamp of the last configuration change. |
| Actions | Edit (pencil icon), Delete (trash icon), and Clone (copy icon) buttons. |
The top-right area contains:
- + New Agent button — creates a brand-new Agent.
- Search bar — filter agents by name.
- Refresh and Settings icons.
Step 2: Create a New Agent
Click the + New Agent button. The platform instantly provisions a new Agent and opens the Agent Builder interface.
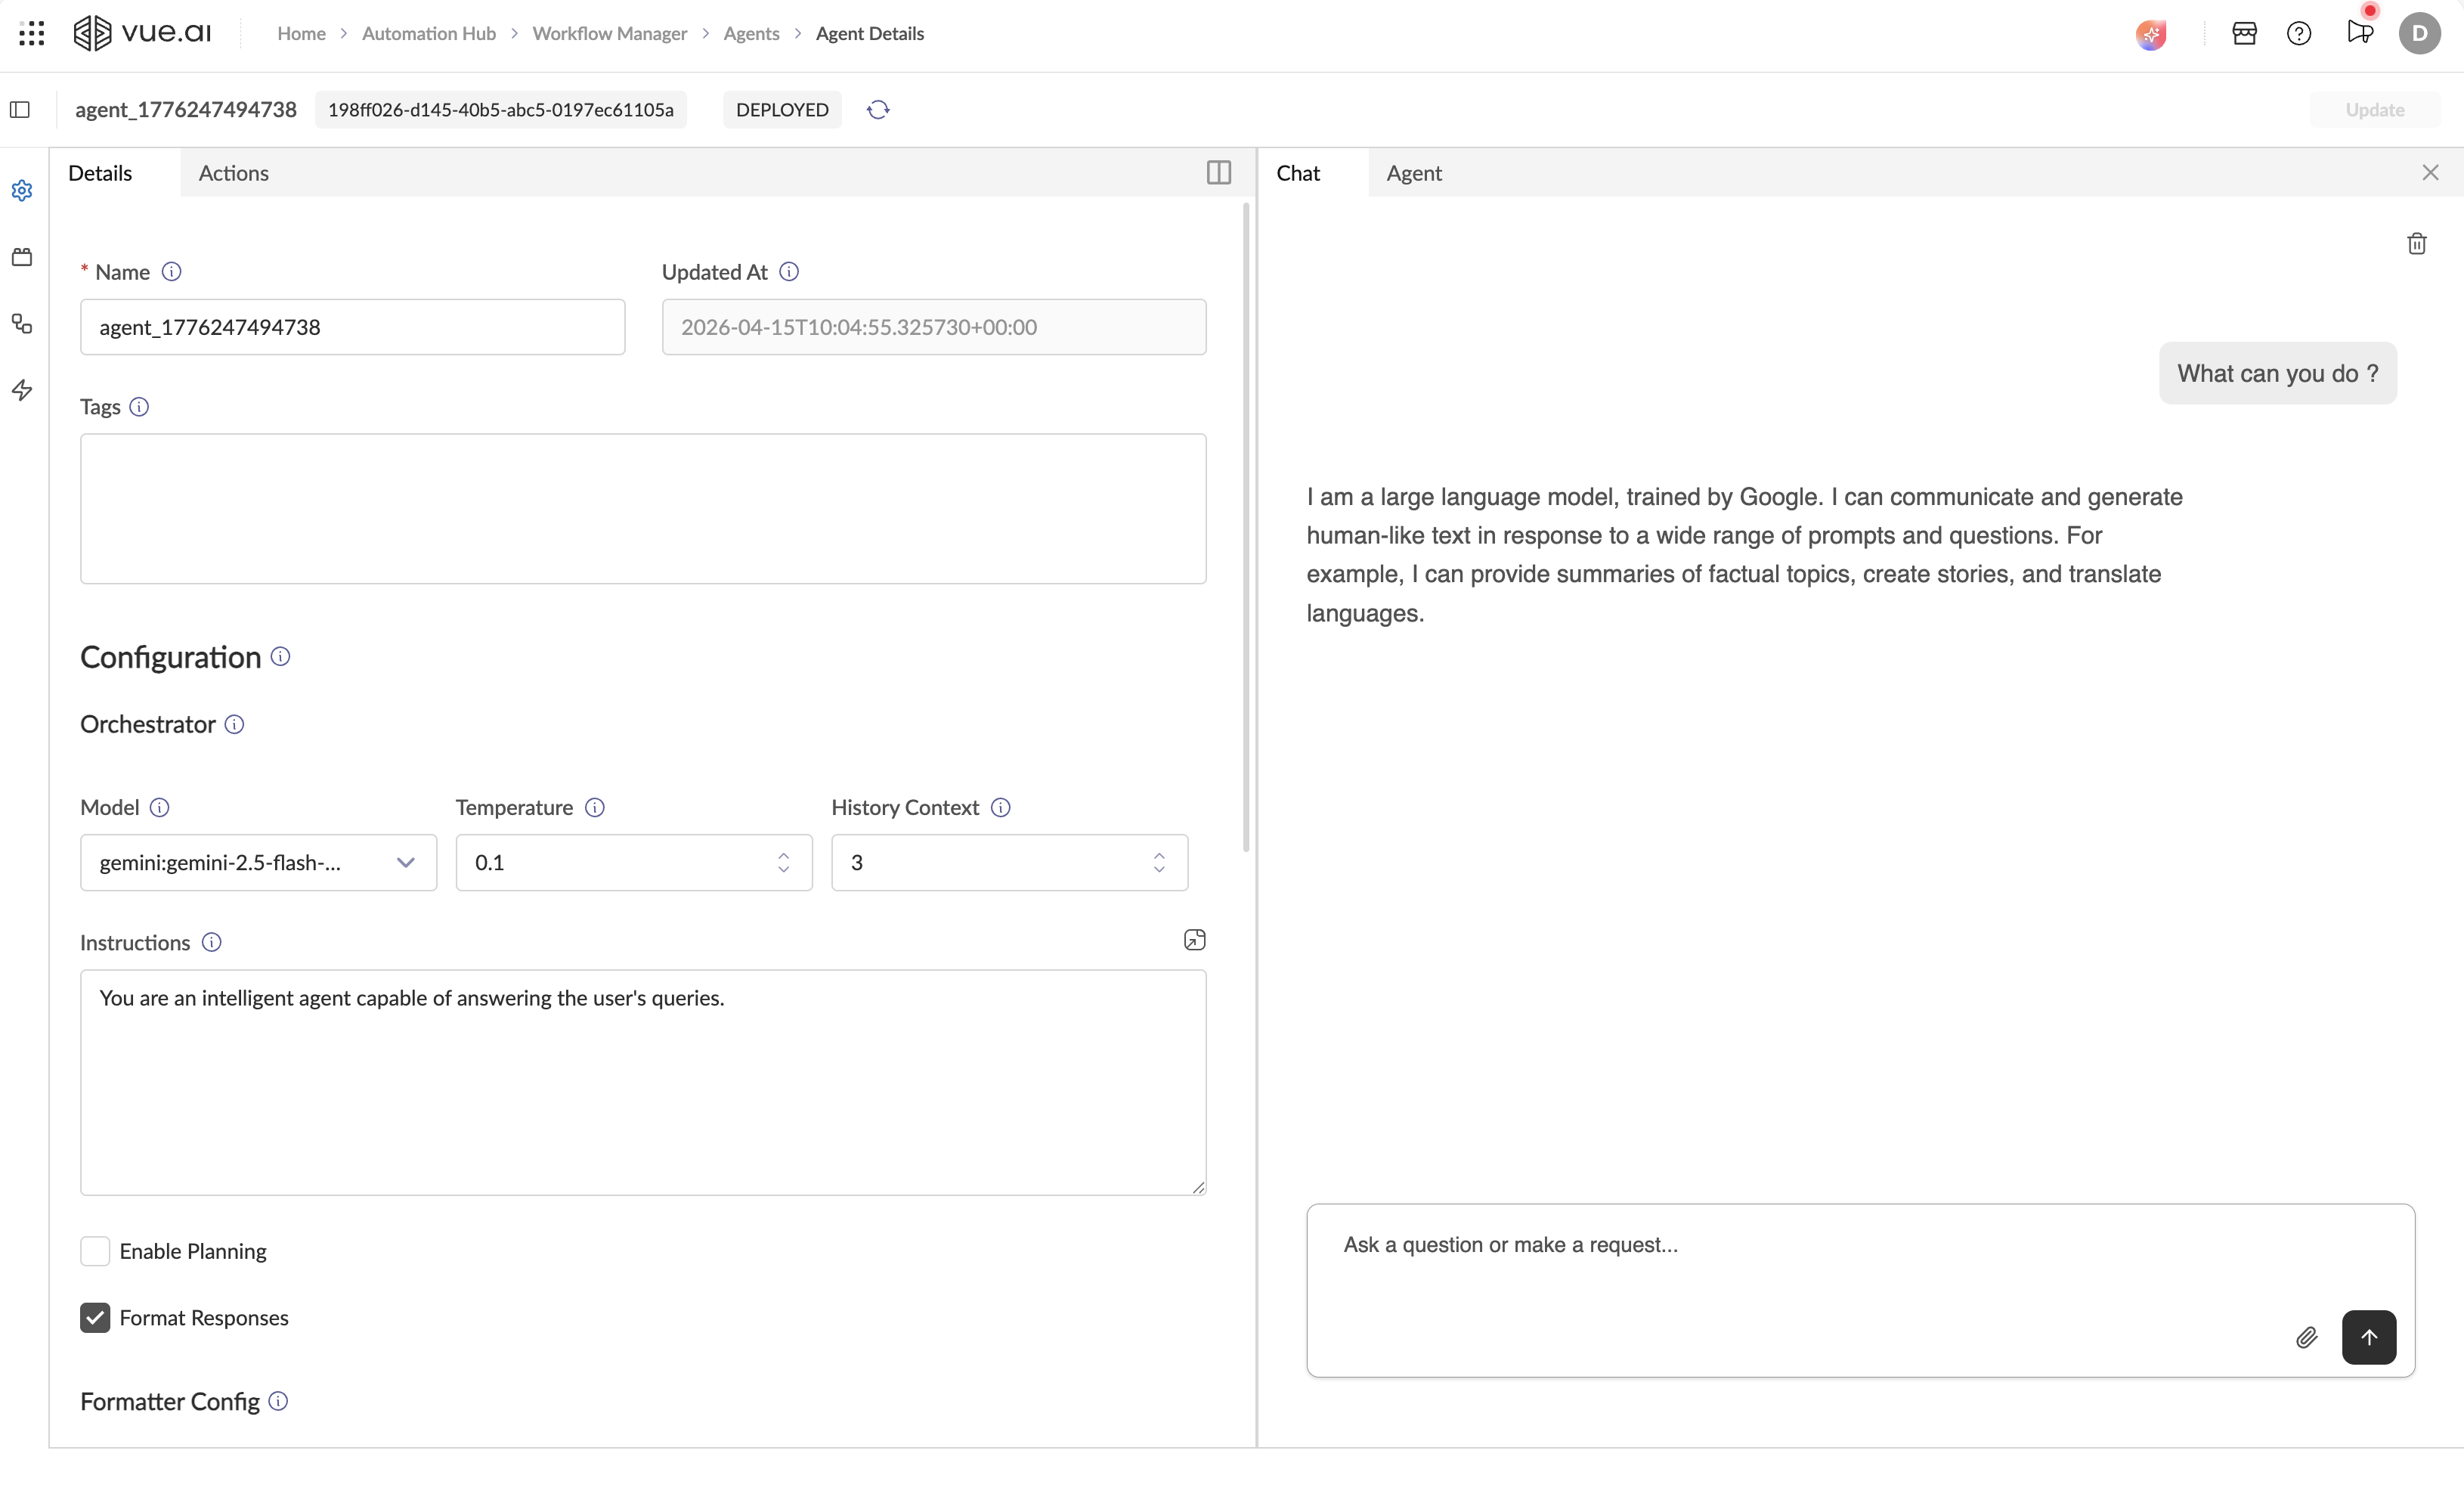
You are now in the Details tab of the left pane. The Agent has been auto-assigned a name (e.g., agent_1776068573598) and a UUID.

Step 3: Configure the Orchestrator
The Orchestrator is the core intelligence node of your Agent. Configure it as follows:
3.1 — Identity Fields
| Field | What to do |
|---|---|
| Name | Replace the auto-generated name with something meaningful, e.g., CustomerSupportBot. This is a required field (marked with *). |
| Tags | Optionally add comma-separated tags for organization (e.g., support, v1). |
3.2 — Orchestrator Configuration
Under the Configuration heading, you will see the Orchestrator section:
| Field | Description | Recommended Value |
|---|---|---|
| Model | The LLM that powers this Agent's reasoning. Click the dropdown to see all options. | gemini:gemini-2.5-flash (fast & cost-effective) |
| Temperature | Controls response randomness. 0.0 = fully deterministic, 1.0 = maximum creativity. | 0.1 for task-oriented agents |
| History Context | How many recent conversation turns the Agent remembers. | 3 (default) |
| Instructions | The system prompt — the single most important field. This defines your Agent's persona, constraints, and rules. This is the only mandatory instruction field. | See example below |
3.2.1 — Write Your System Instructions
In the Instructions textarea, replace the default text with a clear, specific system prompt. For example:
You are a professional Customer Support Assistant for the Vue.ai platform.

Rules:
- Always respond in a friendly, concise tone.
- If the user asks about creating an Action, explain that they should navigate to the Actions tab in the Agent Builder.
- If you don't know the answer, say "I don't have that information" instead of guessing.
- Never reveal internal system details.
Expanding the Instructions Editor
Click the expand icon (↗) in the top-right corner of the Instructions textarea to open a larger editing window. This is useful for long, detailed system prompts.
Step 4: Test Your Agent
Without leaving the Builder, switch to the Chat tab in the right pane.
- Type a test message in the input box (placeholder: "Ask a question or make a request...").
- Press the send button (↑) or hit Enter.
- The Agent responds based on your Orchestrator configuration.
Chat Features:
- File Uploads: Click the paperclip icon (📎) to attach documents or images.
Step 5: Save and Deploy
- After making any configuration changes, the top bar shows an orange Unsaved Changes indicator and a Update button.
- Click Update to save the Agent configurations.
- The top bar will display a DEPLOYED badge confirming the Agent is live.
What's Next?
Your Agent is now running with basic chat completion. To make it truly powerful:
- Add Actions (Workflows & APIs) — Let your Agent trigger automated pipelines and call external services.
- Configure Advanced Behaviors — Enable the Planner, Formatter, and Renderer nodes for multi-step reasoning and clean markdown output.
- Configure Rich Chat Rendering — Configure the Renderer node for rich chat UI components like forms, cards, and quick replies.